Your Cart is Empty

Wondering if you should pick up the Ledger Nano S Plus?
Is it worth the increased cost over the Nano S?
What new features does it offer for the money?
The Ledger Nano S Plus is sleek, sturdy, and most of all, convenient. It features a better screen and a killer feel in the hand.
But is it really worth the extra money over the Nano S?
In this exhaustive Nano S Plus review, find out everything you need to know about Ledger’s third generation hardware wallet.
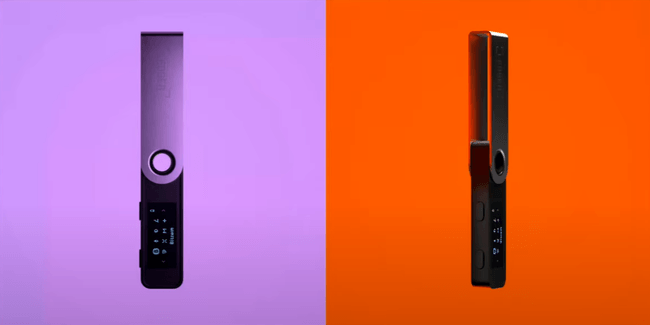

The Nano S Plus is Ledger’s third hardware wallet in its Nano series, a line of small, pocket-sized HD wallets.
Let’s take a look at some of the Nano S Plus specs below:
The Nano S Plus provides cold storage by creating and storing your wallet’s private keys offline.
But before we go too deep, take a look at Nano S Plus alternatives available today:
The Nano S Plus can be thought of as a sort of “middle child” between the original Nano S product and its more advanced Nano X counterpart.
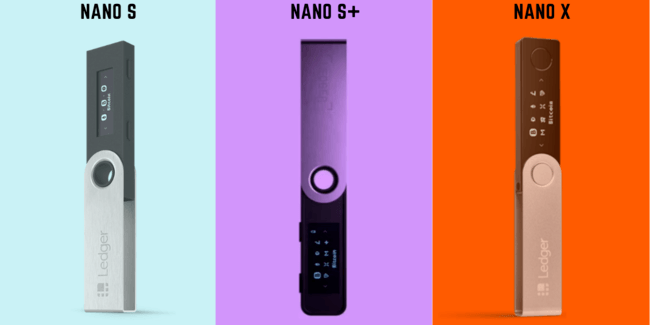
That’s because the Nano S Plus offers some of the features of Nano X and some of the limitations of the Nano S.
Take a look at the table below to see all the similarities and differences.
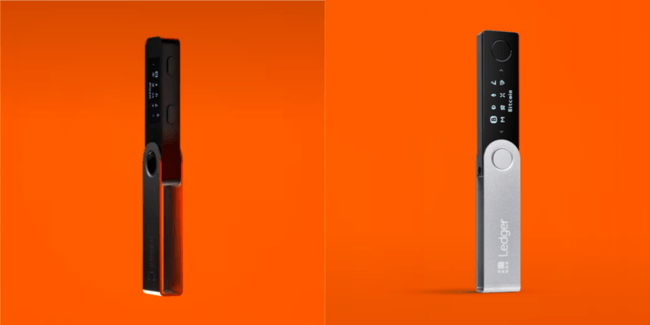
The Nano X and Nano S Plus both feature a hard drive that can hold up to 100 different crypto wallets.
They also feature the same 128 x 64px screen.
When it comes to the body of the the Nano S Plus, it shares a similarly sleek build to the Nano X, but with a matte finish instead of Nano X’s glossy finish.
Another point of difference is the layout of the buttons. On the Nano X, big round buttons sit on either side of the screen. Whereas the Nano S Plus places the buttons on top of the unit, and they are much smaller (similar to the Nano S).
That means navigating the Nano S Plus offers a less premium feel than the Nano X.
Both units offer a USB-C connection type.
Perhaps the biggest difference between the two units is Bluetooth support. Nano X has it. Nano S Plus doesn’t. So if having wireless wallet management is important to you, go ahead and buy that Nano X now. The Nano S Plus is not the wallet you are looking for.
The other big difference is the Nano X’s 8 hour batter. The Nano S Plus has not battery at all, so don’t expect to be using it on the go, unless you have some way to connect it to your android phone.
Price is the final difference. The Nano X will cost you around $140. We don’t have a price for the Nano S Plus yet, but we expect it to be about $100.
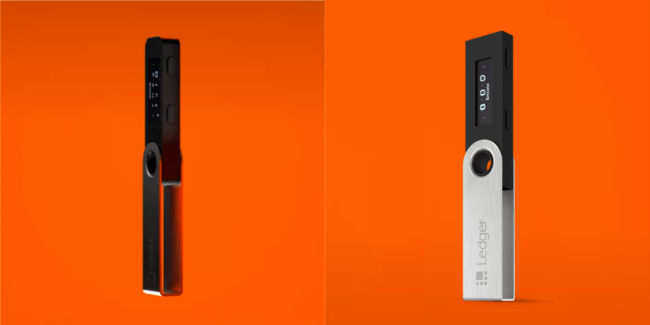
The Nano S Plus offers a much larger hard drive than the Nano S, which can only hold 3 crypto wallets at a time.
If you are just holding, say, Bitcoin and Ethereum, then that won’t matter to you, but its worth considering if you plan on acquiring more coins. The Nano S Plus can hold over 100 wallets at a time.
The screen resolution is another big difference. The Nano S Plus features a 128 x 64px screen resolution, whereas the old Nano S only gives you a 128 x 32px screen resolution.
Finally, the Nano S Plus features a USB-C type connection, which feels nicer than the Nano S’s micro-USB connection type.
Now, lets talk similarities between the Nano S and the S+.
First, neither devices support Bluetooth connectivity or internal battery. This means you must have the Nano S Plus physically connected to a powered device in order to use the wallet at all.
Similarly, both devices feature small navigation buttons on top of the unit, instead of the big buttons on either side of the screen, like the Nano X has.
As for price, the Nano S sells for about $59. The Nano S Plus sells for $79.
Finally, they both feature a matte finish, as opposed to the Nano X’s glossy finish. One point of difference between the build of the Nano S and S+ is the the small lip on the edge of the S+ and the rounded edge of the chassis. The Nano S has no lip and a completely square body.
All of the wallets feature the following:
The Nano S Plus costs $79 USD.
The real question is: is the increased price worth the added features the Nano S Plus offers?
Only you can determine that for yourself, so take a look at the comparison with the Nano S above.
Ledger currently supports over 5,500 coins, including these larger cap projects and all ERC20 tokens.
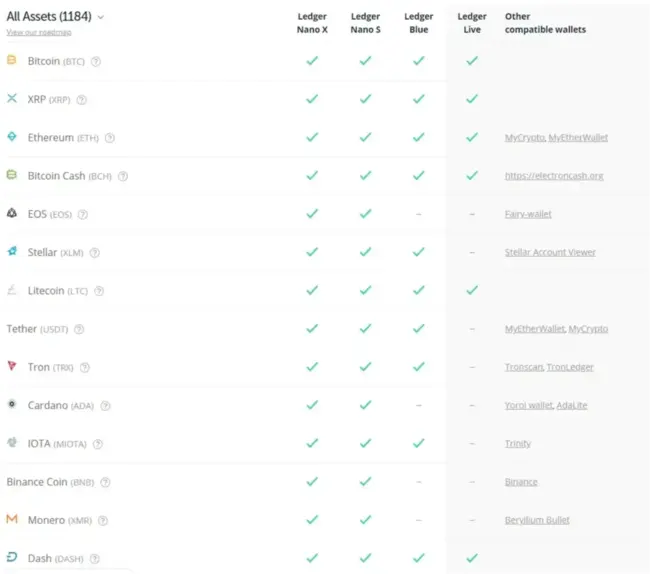
If you are interested in the entire exhaustive list of coins supported by both of the Ledger Nano devices, see our blog post here.
TL;DR: Ledger supports Bitcoin, XRP, Litecoin, Ethereum (along with all ERC20 tokens) as well as all the largest coins, including:
Like all Ledger products, the Nano S Plus is packaged in a sleek box that wouldn’t be out of place for an Apple product.
Here is what the box looks like:
and inside the box, you will find the following:
The provided USB Type C cable is a little short in our opinion, and since Nano S Plus doesn’t have Bluetooth capability, it means you will need a cable whenever you use the device.
That said, it is included in the box and the price is very reasonable. It’s definitely nice to have one included in case you don’t already have a type C lying around since it allows you to get started immediately. So I guess I can’t complain much.
I do, however, recommend picking up a longer type C cable at some point.
Inside the purple info packet, you will find the Quick start guide which is useful for quickly setting up your device. We will cover that below as well in much more detail if you’d prefer that instead.
There is also a nice set of Ledger stickers if that interests you.
Additionally there is a Ledger Live info slip and a regulatory statement which are pretty worthless. Feel free to discard them as the regulatory statement is merely there for legal reasons that don’t apply to you and the Ledger Live info slip contains no important info.
Plus in your Nano S Plus into your computer and download the Ledger Live app directly from Ledger’s website.
WARNING: Do not download Ledger Live from any website except Ledger.com. Select 'Apps and Services' from the top navigation and choose 'Ledger Live'. Then select download. If you download the app from any other website, there is a very good chance the software is malicious and you will lose your coins. Beware.
Note: If you are just holding Bitcoin, there are better wallet managers than Ledger Live that allow you to verify all your transactions on your own.
This is an advanced topic, and we won't cover it here. Just be aware that if you use Ledger Live, you are using Ledger's node to verify your transactions.
The tradeoff is that Ledger Live is very easy to use, but the downside is Ledger Live is not the most private software for using Bitcoin.
Once downloaded, go back to your Nano S Plus.
Follow the prompt’s on the Nano S plus, and create a unique 6 to 8 digit PIN. Once done, you will be asked to confirm the PIN, so enter it again and confirm.
This PIN is used to unlock the device, so keep the following in mind:
If you wouldn’t make someone an authorized user on your bank account, do not give them your PIN either. Anyone with both your device and your PIN can steal all your crypto.
If your enter your PIN incorrectly multiple times, it will completely wipe the device. If that happens, there is only one way to get your coins back - using your backup phrase.
That’s covered next…
Backing up any hardware wallet is more or less the same, and the Nano S Plus is no exception.
The Nano S Plus uses the BIP39 backup standard. You can read more about BIP39 backups in detail on our BIP399 page. In short, you are given 24 seemingly random words when you set up the device. If your Nano S Plus is lost, stolen, or destroyed, you will need these words to get your coins back.
DO NOT lose this backup. If you do, you lose all your coins FOREVER.
As long as you can open the device, you can view this backup phrase at any time, but obviously, you’ll need it most when you can’t access your device.
WARNING: Under no circumstances should you ever record your recovery phrase on any digital device like a phone or computer. You should also not backup this phrase by taking pictures with a camera. You need to manually record it on a physical object such as a piece of paper or a metal backup device, like the Billfodl. The pictures taken of my recovery phrase in this section are purely for educational purposes, and I will not be holding any coins on this device. That is why it is ok for me to show you my phrase for this demonstration.
Your Ledger will now show you your backup phrase which was generated randomly inside the device.
It will show you one word at a time, like the image below:
Write this word down on a piece of paper - you can use the provided papers that came with you Nano S Plus.
Do this for all 24 words.
Once finished, you’ll be asked to confirm the words, again, one at a time.
Once you have confirmed all words, you can move on. If you entered any word incorrectly, ledger will let you know, and you’ll need to start over.
Now, there are two options when backing up your Nano S Plus: the good way and the bad way.
If you want to do it the bad way, use one of the three provided backup booklets shown below.
The reason this is the bad way is because these are made of flimsy paper. If you experience a fire or flood, the paper could be easily destroyed. Remember, this is your backup, after all.
You will rely on this if you ever lose your device, if it is lost or stolen, or if you forget your PIN.
If you want to do it the good way, I suggest purchasing a Metal backup device designed to store a recovery phrase. There are many on the market, but we have created our own called the “Billfodl.
Here is what it looks like:
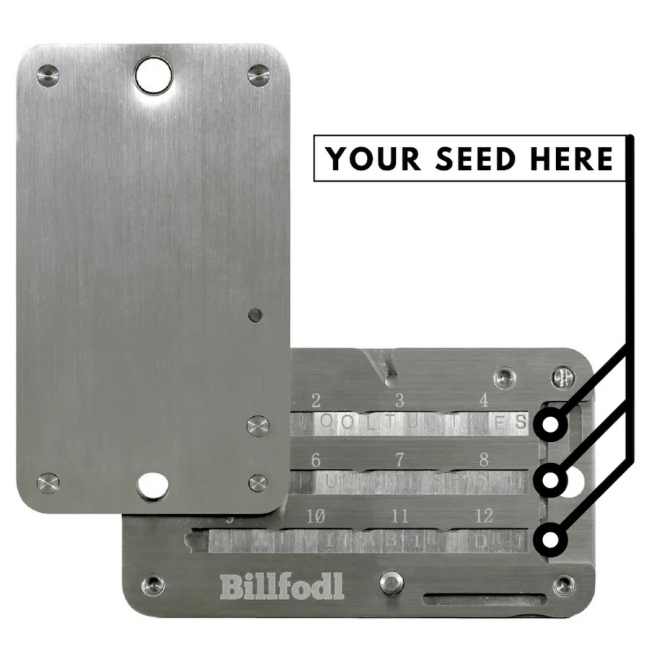
We even had it tested at a Department of Transportation ordinance testing facility, and it survived a 600 gallon jet fuel fire…twice in a row.

You can read about that test on our testing page.
Read more about the Billfodl or purchase a Billfodl if you are sure you want to hold your coins the safest way possible.
The remainder of the set-up is pretty self-explanatory, but if you want an in-depth guide to follow, you can view our Nano S/Nano X set-up guide. The process is identical for Nano S Plus, and I don’t want this to get too long.
One of the more exciting announcements out of the Nano S Plus reveal was the ability to seamlessly store NFT assets on the Nano S Plus and other Ledger devices.
All viewable right inside Ledger Live!
All you have to do is go into your ETH wallet (or other NFT supporting blockchain) and select “See All NFT”.
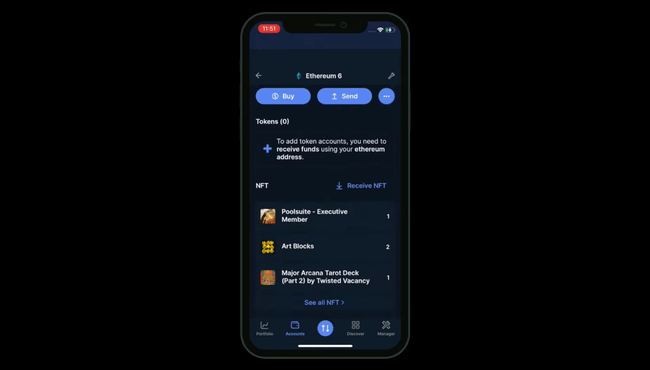
From there, you will be taken to a screen that shows off all your NFTs in one convenient dashboard. All NFT metadata is pulled from the creator.
If you want to inspect one of your NFTs closer, you can do so by selecting it.
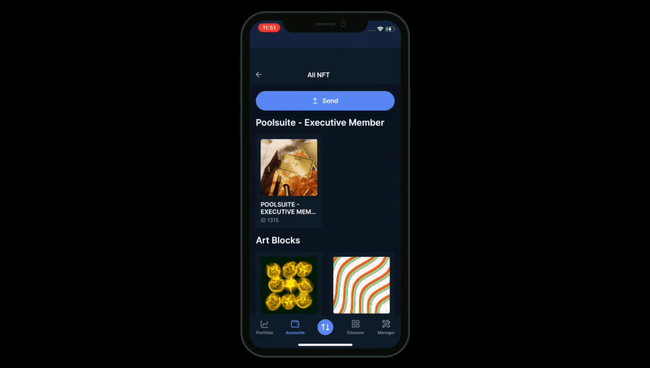
From here, you’ll be shown information about your NFT in a sleek and easy to understand UI.
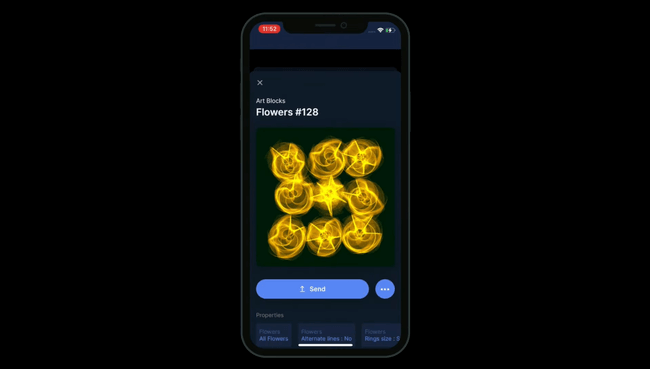
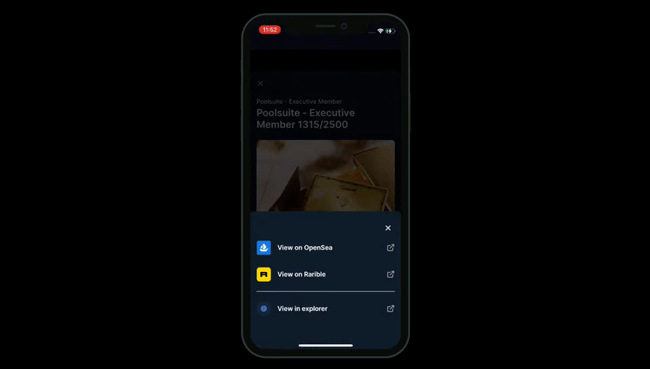
From here, you can view all the marketplaces where you can sell that NFT and list it right from Ledger live.
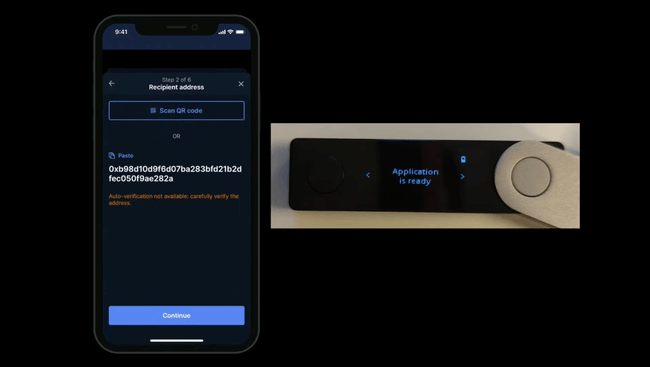
You can also send the NFT to someone else from this screen too.
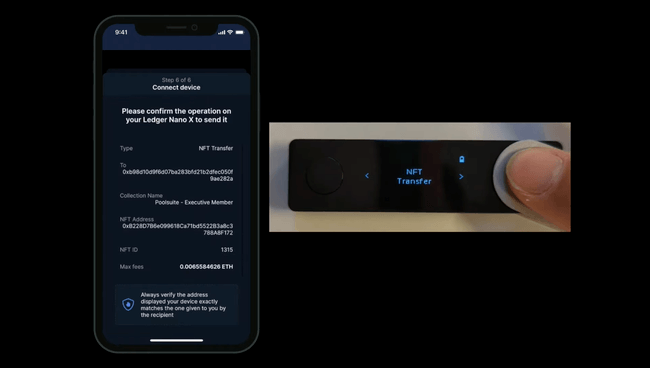
With Ledger Live, confirming transactions for sent NFTs is secure and easy to understand. It feels just like sending Bitcoin or other cryptos from Ledger Live.
And Ledger is adding many more integrations with Ledger Live and the Nano S Plus in the coming year, such as FTX and Rarity, so be on the lookout for your favorites.

Leger Nano S Plus was released in April of 2022. It is now available on the Privacy Pros store.
The Ledger Nano S Plus is a good middle ground between the Ledger Nano X and Nano S.
While we don’t know a price yet, given the features, we can make a reasonable estimation on the price to be around $100.
That is a fair price for what you are getting with this hardware wallet mixed with the good reputation Ledger has.
The quality of life improvements of the S+ come at a premium, but it may be worth it to you if you are storing lots of different coins, but don’t want Bluetooth.

